


One of my favorite items to print on is a brown paper lunch bag. Cut the bottom of the bag off then cut down one side. Unfold the bag into one long sheet.

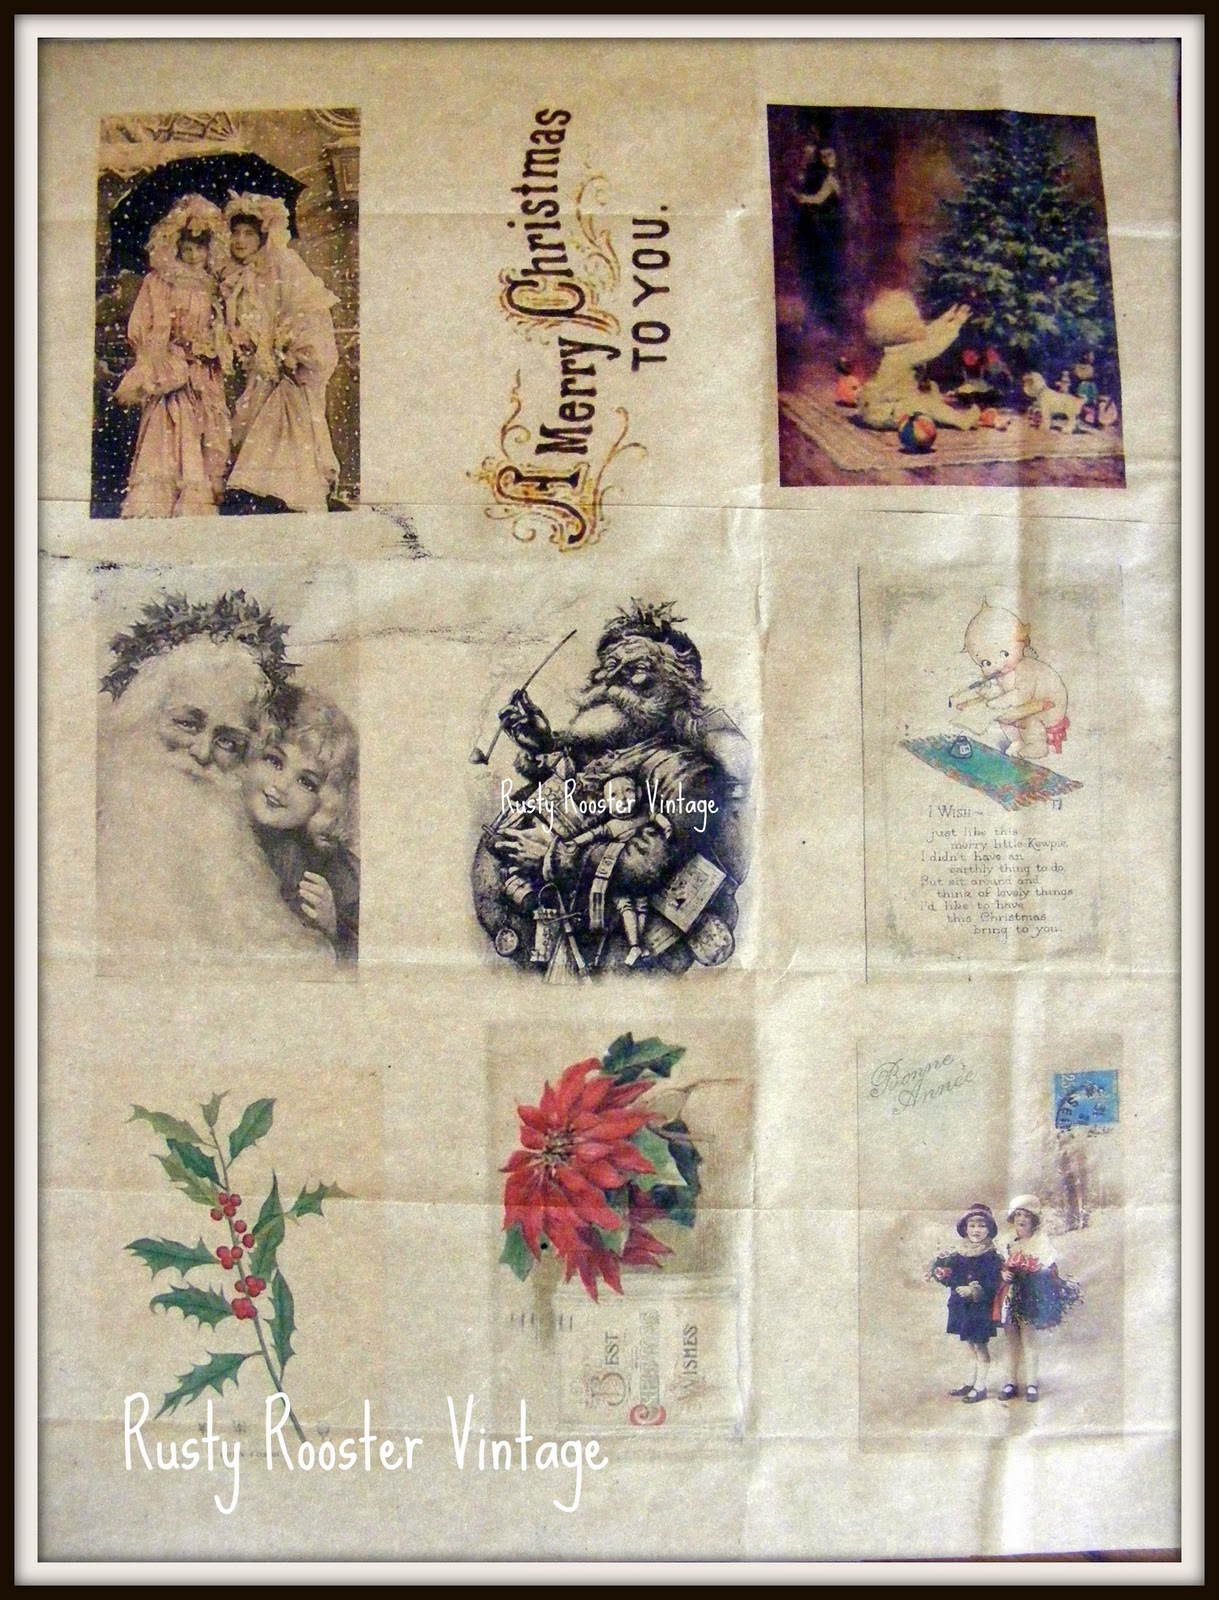
Here's the page once printed. I purchased these graphics from Dawn at The Feathered Nest last year. Dawn has great tutorials for purchase and often shares beautiful images on her site.

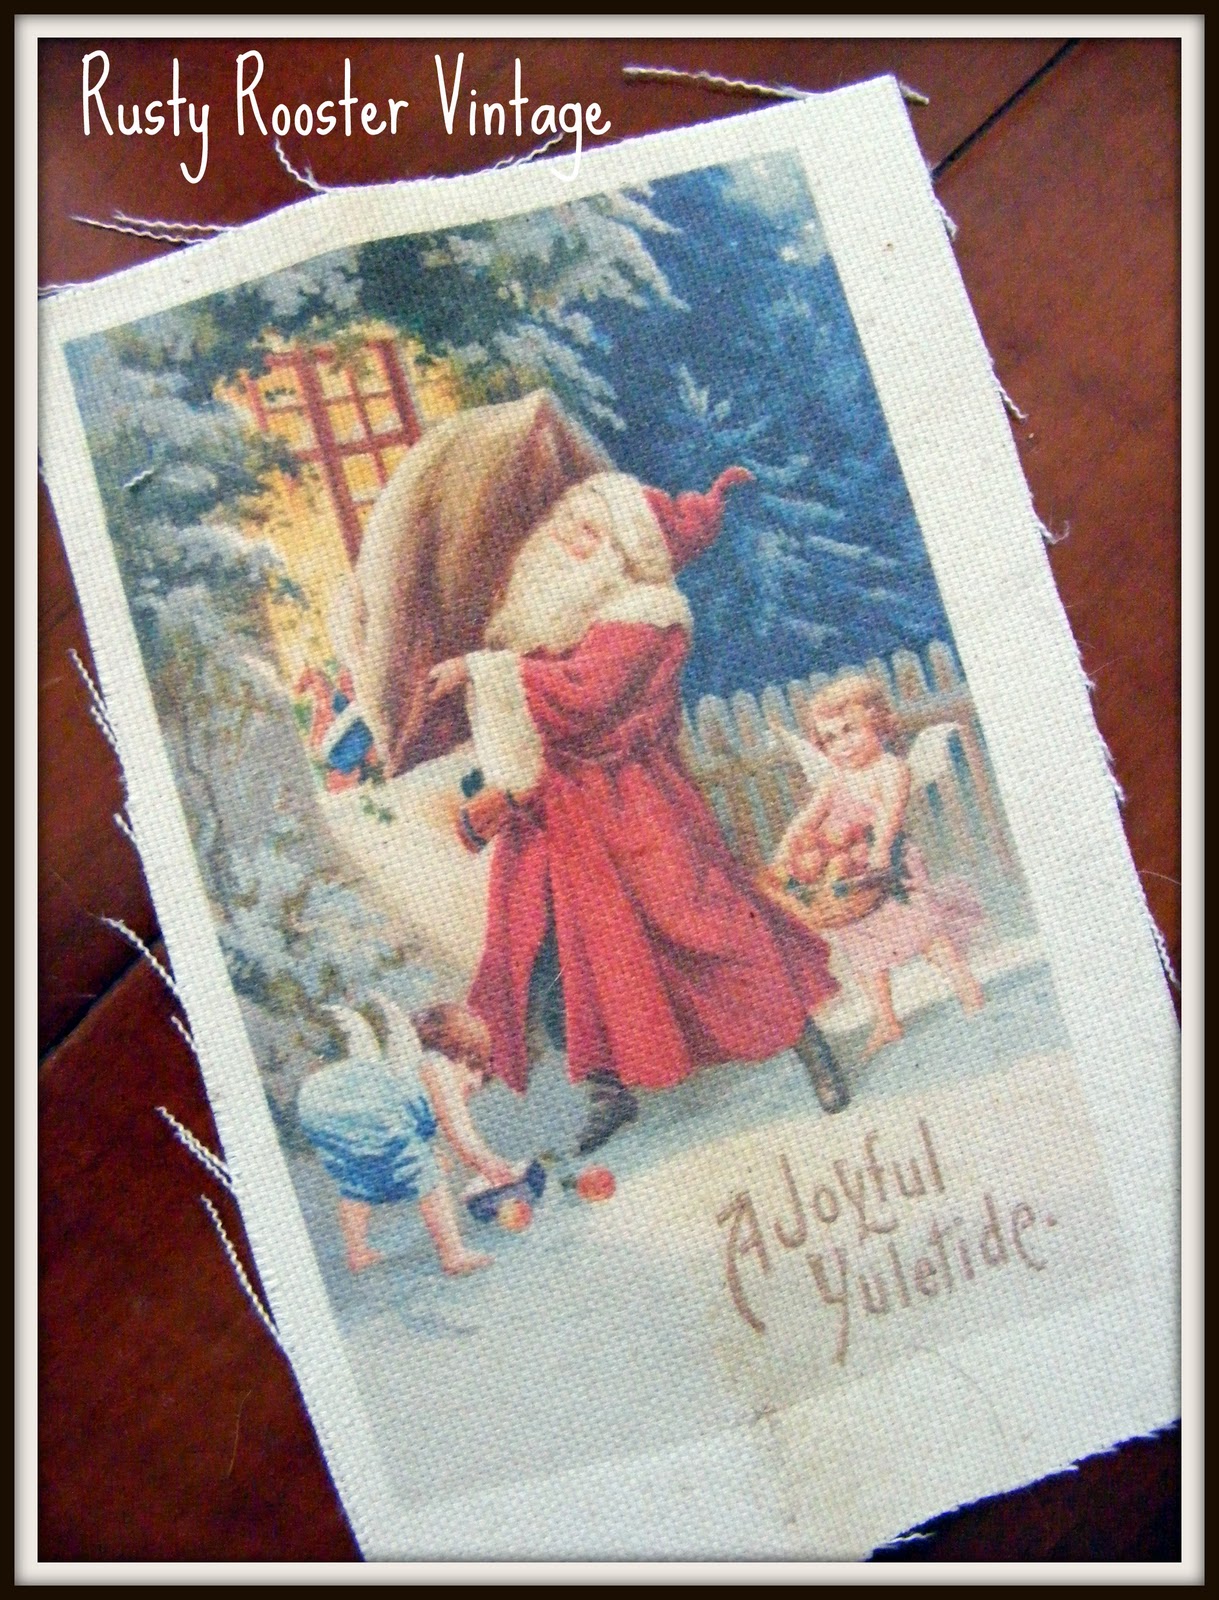
Here's a closer look of one of my favorite images printed on the paper bag. I then cut the image, crumpled it in my hand and now we have...

Perfection! A beautiful distressed color and texture for your project. Add some distressed edges and you are done! Let's try sheet music -

The same rules apply. Apply light mist of adhesive to cardstock then rub on the sheet music. If you are using very lightweight vintage pages (like hymnal sheets or dictionary pages), you may want to try tape here first. I have a designated piece of scrap card stock that I use and it has become like a Cricket mat. It is so sticky now that I rarely have to add more adhesive. Now, why not just send the paper bag or sheet music through the printer by itself? Why do we have to adhere it to cardstock first? Well, it will shift during printing and your images will not be straight. It will also jam most of the time. Adhere the sheet music to cardstock, insert into printer "music" down, use printer settings mentioned above...go!

Beautiful! This Santa is from The Graphics Fairy. Isn't he gorgeous on the sheet music? Peel him off the cardstock or simply trim and distress. He's ready to be framed or used in your next project.


Aren't these vintage images great? They have a soft, matte finish thanks to the fabric. Peel away the cardstock. Trim your image. Distress the edges a bit with scissors and ink.
She's ready for your next creation! You can use the spray adhesive or a simple running stitch to attach her to your next project. No sewing machine needed here. Printing on USED dryer sheets is very similar. You should iron them first if needed. The ink may run with certain brands. There is a film on them that can create problems. I will sometimes wash in soap and water, dry and then print (or stamp) on them. They are better candidates for an image transfer. I prefer printing on canvas but do like a recycled option. It is better to stamp on burlap. Too many tiny pieces to jam your printer. I know it is tempting but I don't suggest it! so, tell me...what do you like to print on? What should we try next? Thanks for stopping by! If you have questions, post in the comments below. This is my first tutorial so let me know how I can improve. Thanks! p.s. I'm linking this post to Mad in Crafts link party!


.JPG)


Great tips, thanks for sharing, hoping to try out some mixed media projects myself soon, although I don't have a great track record when it comes to printers! x
ReplyDeleteWonderful tips! I have been a big chicken when it comes to this but am anxious to try so you've given me courage.
ReplyDeleteOMG! I want to try these so bad... my printer is broken. UGH!!! Thanks for stopping by today! ;)
ReplyDeleteHello new friends! Thanks to each of you for stopping by. Stick to the tutorial and you'll do fine.
ReplyDeleteGreat tips! I have wondered so many times what I could print on but havent been brave enough to try. Thanks for visiting my blog. So glad you found me, since it lead me to your blog :)
ReplyDeleteFun tutorial! Makes me want to play~ I'm inspired! Thanks!
ReplyDeleteWow, I love your blog!! I love all things vintage, and you are 100% unique. Love your ideas. This little Santa is to die for! Thanks for your sweet comments on my blog!
ReplyDeleteIf my husband only knew what I run through his fancy printer! lol Thanks for stopping by. I'm so enjoying making new friends.
ReplyDeleteSo creative!!
ReplyDeleteThis has been on my to try list for sooo long. Need to get in gear and try it! Thanks for the tips!
ReplyDelete*hugs*deb
Amazing...I can't wait to try some of these.
ReplyDeleteThanks so much for coming by...I am your newest follower..
xo bj
I love that black and white image of Santa holding the doll and all the toys, I'm going to print some out on dictionary and music paper! I love the paper bags too! Happy Tuesday!:)
ReplyDeleteThanks for the clear instructions, very helpful. You are not only clever, but brave, grasshopper!
ReplyDeleteLove Santa on the music paper. I must try this!!!!
ReplyDeleteGreat tutorial! I like the santa on the sheet music.
ReplyDeleteOkay so I'm getting this tutorial - so well explained! Just one very important question though...you used husband-printer....have you had any....um.....accidents? And if so do you have a handy-you-still-love-me-but-your-printer-blew-up excuses for "her". You know just in case.....
ReplyDeleteSeriously though, thanks for the wonderful tutorial! And yes, Dawn's graphics are wonderfully delicious (not that I've tried to eat any of them once on paper...)
Purrs!
Romeo and "her"
Vicki-all of these ideas are great! I have run burlap through my printer with no problems...I use the tighter woven burlap...
ReplyDeleteThanks for all the tips!
I've added you to my blog roll...
Thanks for stopping by JUNKWILD!
Tammy :-)
Girl...FANTASTIC tutorial!!!
ReplyDeleteI love all of your images and yes...Dawn shares the BEST ones with us! I just love her to pieces :)
You make me want to go print everything in sight...the only bad thing is it's almost midnight and I don't think I'll be "pretty" in the morning if I play all night! haha
Loved this post.
Have you ever tried ironing your fabric on freezer paper? That is REALLY inexpensive...no adhesive necessary and a roll lasts forever!
ps...check your email you lucky girl~
that is awesome, i want to try it!
ReplyDeleteThanks everyone! I decided I had to post this tutorial when I saw folks selling images on dictionary paper for $10. I wanted to let everyone know just how easy it is. Tammy, I have done burlap too. I used a very tightly woven and more expensive version. It worked just didn't want to be responsible for readers using all kinds of burlap and breaking printers! lol Jodi - I am so excited to win your giveaway!! So glad you guys liked this tutorial. Love your comments. Romeo- your worse case is a paper jam. You can do it!
ReplyDeleteYou have great ideas! I have spent some time looking through your blog and love it! Thanks for stopping by my blog...I'm a new follower of yours!
ReplyDeleteHi Vicki! Great tutorial... I haven't ventured into using my printer like this yet... I need to give it a try... not sure how the hubby would feel though. :) Thanks for all the tips! Nice to meet you and thanks for visiting!
ReplyDeleteKendra
Creative Ambitions
This is a fantastic tutorial, thank you!
ReplyDeleteI'll definitely try some of these out for the holidays.
Hope you have a wonderful Wednesday!
Hugs,
Anne
Hi Vicki,
ReplyDeleteI just happened upon your blog and I love it!
I'm the same, I have tried using all kinds of stuff in my printer and I know what you mean when you say "scary paper jams"! This is a wonderful project, I'll have to try it out. Thanks so much for the tutorial!
Have a great day.
Sincerely,
Melinda
So glad you liked it my friends. Appreciate your sweet comments. Come back for a visit soon and to meet the chickens.
ReplyDeleteWOW! I'm so going to have to give this a whirl!! Thank you for the tutorial!! You're so creative! I'm happy to be your newest follower of your adorable blog and I'd love to have you as a friend at Frou Frou Decor! Be sure to link up your sweet creations each Friday-Sunday at my Fabulous Friday Finds party! Hope to see you there!!
ReplyDeleteHugs,
~Terrell @ Frou Frou Decor~
I am sold. Just came over from Funky Junk. I am going to try all these when I have time. Thanks Ann
ReplyDeleteThank you so much for this xmas tutorial! I'm thrilled to find such an inspiring post with a fabulous tutorial that helps me get the jump on my Christmas crafting.
ReplyDeleteI love it!
That Santa image is one of my favorites! I printed him out last year but never used him--yet! Love your project and the tips on all the great stuff one is able to run through the printer!
ReplyDeleteWonderful!!! Thanks for sharing your tips and techniques. Printing on fabric is my new favorite hobby, and now you've given me some other ideas to try! Thank you so much for linking this up to Brag Monday.
ReplyDeleteGreat ideas! I am going to try this right now!
ReplyDeleteBeautiful work!